
Year: 2024
-
Mastering Success: The Art of Online Marketing Analysis in the Digital Age
The Importance of Online Marketing Analysis for Business Success In today’s digital age, online marketing has become a cornerstone of success for businesses across all industries. However, simply implementing online marketing strategies is not enough; to truly thrive in the competitive online landscape, businesses must also conduct thorough and regular marketing analysis. Understanding Your Audience…
-
Unlocking Success: The Art of Search Engine Optimization (SEO)

The Power of Search Engine Optimization (SEO) The Power of Search Engine Optimization (SEO) Search Engine Optimization, commonly known as SEO, is a crucial digital marketing strategy that focuses on increasing the visibility and ranking of a website on search engine results pages (SERPs). In today’s competitive online landscape, having a strong SEO strategy is…
-
Unleashing the Power of Top Digital Marketing Strategies in Today’s Business Landscape
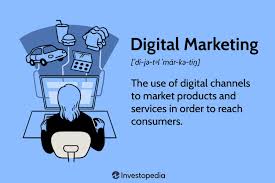
The Power of Top Digital Marketing Strategies in Today’s Business Landscape In the fast-paced digital age we live in, having a strong online presence is crucial for businesses looking to thrive and succeed. Digital marketing has become a cornerstone of modern business strategies, offering innovative ways to reach and engage with target audiences. Let’s delve…
-
Unlocking Success: The Evolution of Real Estate Online Marketing Strategies

The Power of Real Estate Online Marketing The Power of Real Estate Online Marketing In today’s digital age, the real estate industry has seen a significant shift towards online marketing. With more and more homebuyers turning to the internet to search for properties, real estate agents and agencies are recognising the importance of establishing a…
-
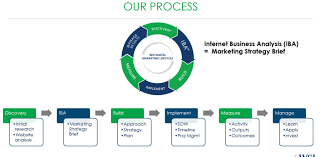
Mastering the Art of Online Marketing Analytics: A Guide to Data-Driven Success
The Power of Online Marketing Analytics The Power of Online Marketing Analytics In the fast-paced world of digital marketing, data is king. Online marketing analytics play a crucial role in helping businesses understand the effectiveness of their marketing efforts and make informed decisions to drive success. By leveraging the power of analytics tools, businesses can…
-
Unlocking the Potential of Organic Digital Marketing Strategies
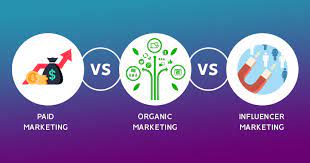
The Power of Organic Digital Marketing The Power of Organic Digital Marketing In today’s fast-paced digital landscape, businesses are constantly seeking ways to stand out and connect with their target audience. One effective strategy that has gained significant traction in recent years is organic digital marketing. Organic digital marketing focuses on growing a brand’s online…
-
Unlocking the Potential of Internet Digital Marketing Strategies
The Power of Internet Digital Marketing The Power of Internet Digital Marketing In today’s digital age, the internet has revolutionised the way businesses promote their products and services. Internet digital marketing has become an essential tool for reaching a global audience, building brand awareness, and driving sales. One of the key advantages of internet digital…
-
Unlocking the Potential of Google Analytics in Digital Marketing Strategies
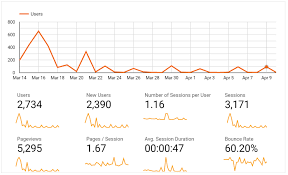
The Power of Google Analytics in Digital Marketing The Power of Google Analytics in Digital Marketing In the fast-paced world of digital marketing, data is king. Understanding how your online efforts are performing is crucial to making informed decisions and maximising your marketing ROI. This is where Google Analytics steps in as a powerful tool…
-
Mastering the Art of Digital Marketing Communication: Engaging Your Audience in the Digital Age
The Power of Digital Marketing Communication The Power of Digital Marketing Communication In today’s fast-paced digital world, effective communication is key to reaching and engaging with your target audience. Digital marketing communication plays a crucial role in building brand awareness, driving customer engagement, and ultimately increasing sales. Connecting with Your Audience Digital marketing communication allows…
-
Empowering Nonprofits: Harnessing the Potential of Digital Marketing
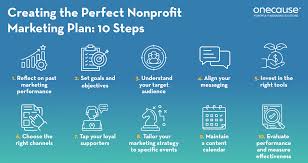
Digital Marketing for Nonprofits The Power of Digital Marketing for Nonprofits Nonprofit organisations play a crucial role in addressing social issues and making a positive impact on communities. In today’s digital age, leveraging the power of digital marketing can significantly enhance the reach and effectiveness of nonprofit campaigns. Increased Visibility and Awareness Digital marketing allows…